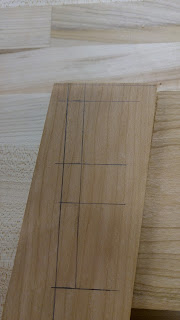
Tenons First
Because the legs are on an angle, I chose to cut the tenons first. I did this because I was going to have to pound out the mortises by hand. Because of the size (width) of the table aprons, I chose to use double tenons. The reason for this all about stability. If you make a really big tenon, you would need to make a really big mortise and this could compromise the integrity of the joint because you would have to remove so much material from the legs. First, I layout the tenons, and I cut these by hand.
Once I get the tenons cut, you want to stay outside of your lines, I use chisels and hand planes to fine tune the tenons down to the lines. Just take your time and sneak up to the lines.
Mortises Next
Once the tenons are cut, I move on to the mortises. I use the tenons as my "template" to layout the mortises. Also, make sure you number your joints from the aprons to the legs. You should have a "1" and "1" on the tenon and mortise joints, then "2" and "2" and so forth. The reason for this is, each joint will fit just a little bit differently, no matter what you do. This ensure that you are matching up each one the same, every time. So, use your tenons, and layout your mortises.
Once you have your mortises laid out, it's time to get chopping! Using your mallet and chisels, just take your time and start chopping to your lines. Don't start chopping at your lines, start about a 1/16" away from the line, remove most of the waste, then work to the line.
Take your time, get a good snug fit and then dry fit the whole assembly.
Finishing Touches
Once you have all your joints dry fit and nice and tight, ensure all your parts are sanded to your liking and then it is ok to glue up the base and get ready for the top.
Final Thoughts/Tips
In woodworking, joinery is everything. You can have the best hand carved finial, or elaborate veneer, but if your joiner isn't any good, the piece will not last and will end up in a scrap heap somewhere. To ensure the longevity of your work, you want to ensure you have great, strong, joinery. To do this, take your time, layout your joints carefully, sneak up to your lines with cutting the joints and break each task down to their most simple parts.


This is a nice table. I think it is really a good thing if you can transform your old products into new one
ReplyDelete