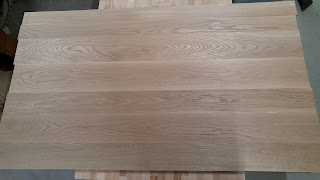
A friend of mine recently bought a house here in town and the house has some really great outdoor space in the back. He has a nice deck, that leads down to a nice patio where there is a hot tub and a pool. The house has a large built-in gas grill, but he is more of a Green Egg guy, so he bought a really big cedar table that the Egg sits in and then has a large granite top; huge space. The one thing that was missing was a large table to entertain people outside after all that cooking on the two grills. So, he asked if I could build him a large dining table for the deck and I said "of course!".
Design
He wanted a table that would be able to comfortably seat 6 people, with unobstructed leg room. He also wanted it to have look hefty; a.k.a, manly. We kicked around the idea of a trestle style table, but he wasn't keen on the idea of people potentially hitting their legs on the cross members. So, we decided on just a traditional 4 leg table, but with the legs pushed to the edges of the table for maximum room. The legs are going to be 5" square, BIG! I also had in my mind that we would put a little taper in them, but I wanted to wait until the legs were milled up before bringing up the idea.
The table was going to have smaller than normal aprons connecting the legs to allow for someone to pull real close to the table if need be. Lastly, the top was going to an inch thick with the boards running the length of the table, not laterally as is often done on long tables. For the top, I had recommended
breadboard ends, which he ultimately did not want, but I think he may ultimate regret that (more on this later on). The reason I pushed for the breadboard ends is that it helps to keep the top flat by not allowing it to bow and cup, but still allows for the wood to move with natural, seasonal expansion and contraction.
Wood Selection
Because this table was going to be used outside, I needed to select something that was going to withstand the punishment. Here in the South, we don't have extreme seasonal swings, but we do get a taste of all four season, but Summer is the most brutal with the heat and humidity. At first we were going to use White Cedar, but I could not source pieces thick enough for our use. My second wood of choice, which is what we ended up selecting, was White Oak. I had done a lot of research on the use of White Oak for outdoors and it had great results. I also figured, if they can build ships out of it, that last hundreds of years, why not a table?
So, off to my favorite wood store,
Peach State Lumber here in North Atlanta. This is my go-to store because they have just about any kind of wood you want, in just about any size you want. So, I had done all the calculations of the amount of wood I thought we would need, and loaded up.
As usual, I always get rough sawn wood and then mill it myself. I have the equipment and it saves money.
Bottoms up!
In building the table, I wanted to start with the legs first, for a couple of reasons. First, the legs were going to set the tone for the overall table. Second, to get the desired leg thickness, I was going to have to laminate 3 pieces together so this was going to require extra milling and glue time, which meant it was going to be the most time consuming part of the project. Once we joined and planed the pieces nice, smooth and clean, we glued them up.
Once the the glue was good and dry, I used a card scraper to get the bulk of the glue nibs off, and then I used a No. 4 to clean up the rest.
Once I had the glue cleaned off, I ran the pieces over the jointer again, to ensure they were square, and then finished them in the thickness planer to mill them to their final dimensions. The result is some very big table legs! 5"x5" White Oak. Each leg probably weighs in the neighborhood of 40lbs.
Next Steps
The next part of the project will be to begin milling the boards for the top and the aprons. Once the aprons are milled, then it will be time to do the mortise and tenon joinery. So, come back for Part 2 of the outdoor table build and see how we handled that process. Thank you and be safe!


