Next, I wanted to do something with the corners of the table, I didn't want it to be just square or just round the corners so I went with what is called a clam shell corner. it just so happens that my dining room table is like this so I took a quarter inch piece of plywood and traced it out to make a template. I modified it just a little, traced it onto my table top and cut it out on the band saw and used my spindle sander to sand to the line. Here is a view of it roughed out.
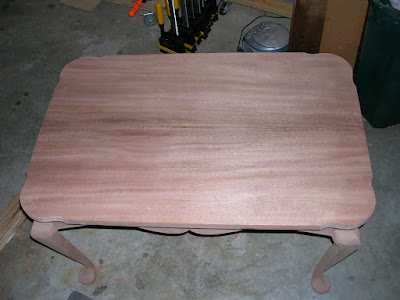 |
| From Coffee Table |
You can see the pattern, especially in the upper right. You can also make out the book match effect a little with the dark grain pattern in the middle of the board. So, normally I would just round over the top of the edges and be done with it, but I really wanted to test my skills on this project so I decided to do a double bead. I had seen this somewhere else and really liked it. Because of the grain on the top, I didn't want to risk using a router and have it take a chunk out of the edges. So what I did was approach it in two steps. First, I use a rabbet bit in the router and routed a 1/8" groove, centered, around the edge of the board. Next, I took a piece of metal and made a scratch stock. This allows me to control the cut by adjusting the angle and pressure to make sure I'm not doing too much at one time. From there, it was just pure putting my back into it and taking my time. Here's a shot of the scratch stock and the edge I'm putting on the top.
 |
| From Coffee Table |
Here you can really see the groove that I cut and the double bead I'm talking about; this is really turning out nice in my opinion and just adds another nice little touch. It was a lot easier to do than I though. Now I need to do some finish sanding and start thinking of how I want to finish it. Ideas/suggestions welcome on the finish!
No comments:
Post a Comment